How to Integrate Google Drive with FastAPI Using OAuth2
generated by nano banana 🍌
Integrating Google Drive with FastAPI enables powerful features like cloud storage synchronization, workflow automation, and secure file access. Whether you’re building a SaaS application, internal tooling, or document processing pipelines, Google Drive integration allows your FastAPI backend to authenticate users, fetch their Drive files, and download or process them securely.
In this comprehensive guide, you’ll learn how to:
- Implement Google OAuth2 in FastAPI
- Securely store and refresh Google tokens
- Fetch and list Google Drive files
- Download single or multiple files from Drive
- Log out and invalidate tokens
- Structure your backend for scalability
This tutorial includes full source code, a complete explanation, and an OAuth2 Flow Diagram.
Why Integrate Google Drive With FastAPI?
Here are some high-impact use cases:
- Build a document management system
- Allow users to upload Google Drive docs into your app
- Automate PDF extraction or cloud-based processing
- Sync Drive folders for automation workflows
- Enable “Login with Google” + Drive browser UI
FastAPI’s asynchronous nature and Google’s APIs make the combination ideal for modern cloud applications.
Prerequisites
Make sure you have:
- Python 3.11+
- FastAPI
- Google API Python Client
- SQLAlchemy
- A Google Cloud Console Project
Step 1: Create Google OAuth Credentials (Required)
Before writing any FastAPI code, you must configure OAuth credentials.
Create a Project in Google Cloud Console
https://console.cloud.google.com/
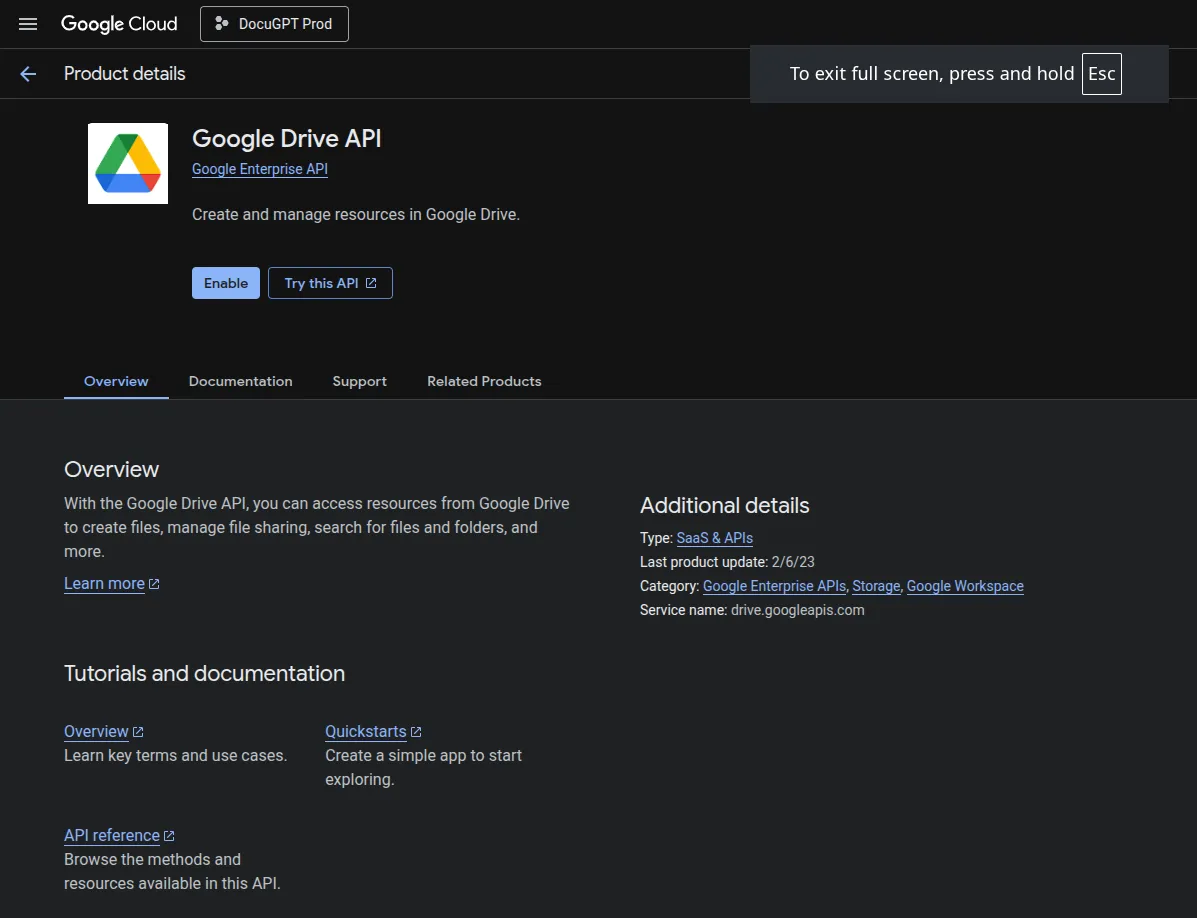
Enable Google Drive API
Navigate to:
APIs & Services → Enable API → Google Drive API
Create OAuth Client ID
Go to:
APIs & Services → Credentials → Create Credentials → OAuth Client ID
Choose:
- Web Application
- Add redirect URI:
http://localhost:8000/google/callbackOr for production:
https://yourdomain.com/google/callback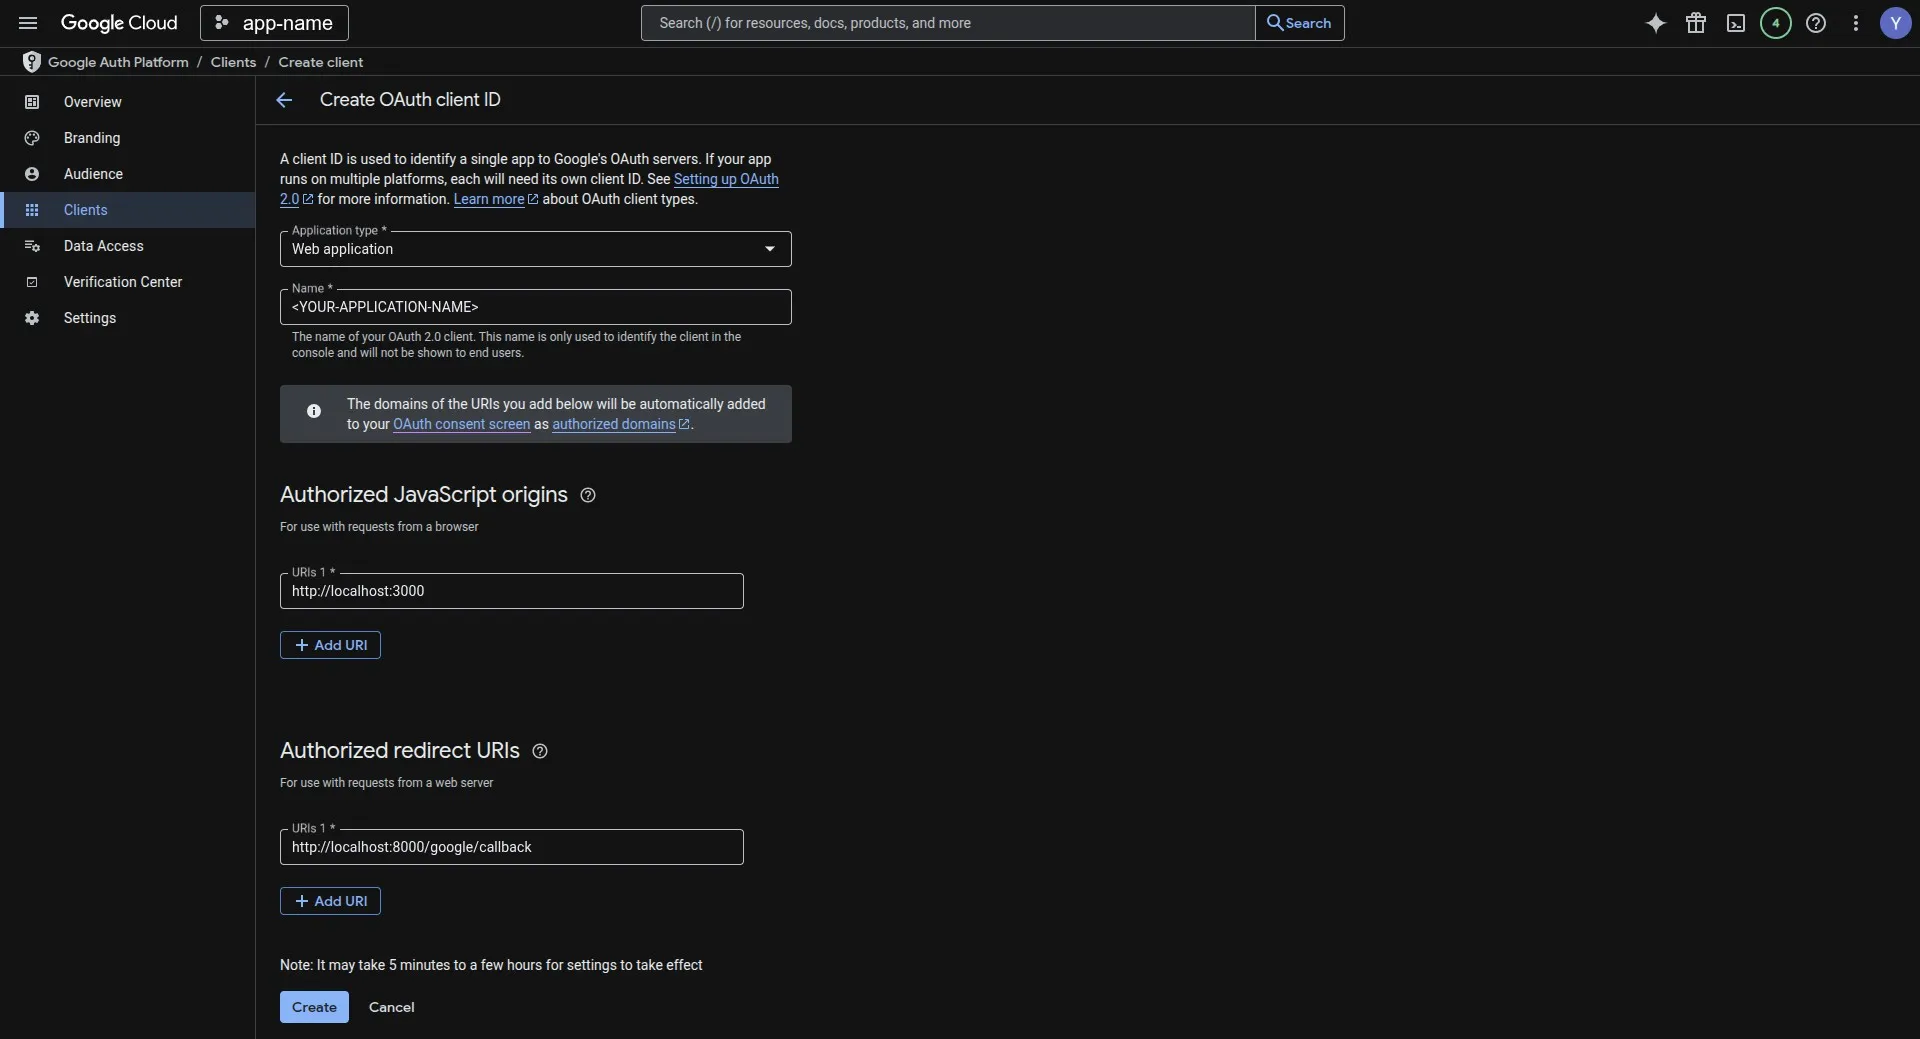
Save Client ID & Secret in .env
GOOGLE_CLIENT_ID=your-client-id
GOOGLE_CLIENT_SECRET=your-client-secret
BACKEND_URL=http://localhost:8000
DOWNLOAD_DIR=./downloads
OAuth2 Authentication Flow (Diagram)
Below is a simple, visual Google OAuth2 flow diagram you can embed in your blog:
                    ┌───────────────────────────┐
                    │         User UI           │
                    └──────────────┬────────────┘
                                   │ Click "Login with Google"
                                   ▼
                        ┌──────────────────────┐
                        │     FastAPI Backend  │
                        └──────────────┬───────┘
                                       │ Redirect to Google OAuth URL
                                       ▼
                           ┌────────────────────────┐
                           │   Google OAuth Server  │
                           └──────────────┬─────────┘
                                          │ User selects Google account
                                          │ User grants Drive permissions
                                          ▼
                      ┌──────────────────────────────────┐
                      │ Google redirects back to FastAPI │
                      │   /google/callback               │
                      └─────────────────────┬────────────┘
                                            │ FastAPI exchanges code for tokens
                                            │ Save tokens in DB (access + refresh)
                                            ▼
                               ┌─────────────────────────────┐
                               │  FastAPI grants access to   │
                               │ Google Drive API via tokens │
                               └─────────────────────────────┘
Add your own branded or graphical version later.
Step 2: Complete FastAPI Google Drive Integration
Below is the full working code (exactly from your original submission). This code handles:
- Google OAuth
- Saving tokens
- Refreshing expired tokens
- Listing Google Drive files
- Downloading files
- Logout
Full FastAPI Code (Google Drive Integration)

Step-by-Step Code Explanation (SEO Optimized)
🔑 1. Handling OAuth Authentication
The /api/auth/google endpoint creates the Google authorization URL:
@app.get("/api/auth/google")
async def google_auth():
Why it matters (SEO-focused explanation)
This endpoint initiates the Google OAuth2 authentication process in FastAPI, generating an authorization URL where the user grants access to their Google Drive files.
This is essential for enabling Google Login + Drive access in modern SaaS applications.
2. OAuth Callback — Exchanging Code for Tokens
@app.get("/google/callback")
async def google_auth_callback(...)
What happens here:
- User returns after Google login
- FastAPI exchanges
code→ access token + refresh token - Fetches user email
- Saves/updates tokens in DB
- Returns success HTML
This is a required step for any Google OAuth2 FastAPI backend.
3. Token Refresh Logic
Google access tokens expire every 1 hour, so we must refresh them:
def get_valid_credentials(user_email: str, db: Session):This ensures:
- No expired-token errors
- Users don’t need to log in again
- Backend stays authorized indefinitely
Perfect for backend automation and cron jobs.
4. List User’s Google Drive Files
@app.get("/api/list-drive-files")Returns important metadata:
- ID
- Name
- MimeType
- Owner
- Size
- Created/Modified timestamps
Ideal for building a UI like:
“Browse your Google Drive files inside our app”.
5. Download Files from Google Drive
@app.post("/api/download-file")This allows:
- Server-side processing of Drive files
- Importing documents
- PDF extraction & ML pipelines
- Cloud backups
The file is downloaded in chunks and stored under /downloads.
6. Download Multiple Google Drive Files
Useful for:
- Batch exports
- ZIP preparation
- File syncing workflows
7. Logout & Token Deletion
@app.delete("/api/logout/{user_email}")This removes saved Google tokens so the user must re-authenticate.
Conclusion — You Now Have a Production-Ready FastAPI Google Drive Integration
By following this guide, you’ve built a secure, scalable, and fully working Google Drive integration using FastAPI. You now have the ability to:
✔ Authenticate users with Google OAuth2 ✔ Store & refresh tokens securely ✔ Access Google Drive using API ✔ List and download user files ✔ Build powerful cloud storage features
This setup is ideal for:
- Document processing apps
- Automation / AI workflows (LLMs + PDFs)
- Enterprise dashboards
- Cloud sync services
- File ingestion pipelines